Trip Report: Temple Crag, Dark Star, 5.10c Grade V Alpine
The alarm went off at 4 AM. I might have already been awake; the tent was at a bit of a tilt, and I had been fighting rolling off/down hill the whole night. Polly and I were camped at the Third Lake outside of Temple Crag. Our objective: Dark Star, a 2,200 vertical foot grade V climb rated 5.10c.
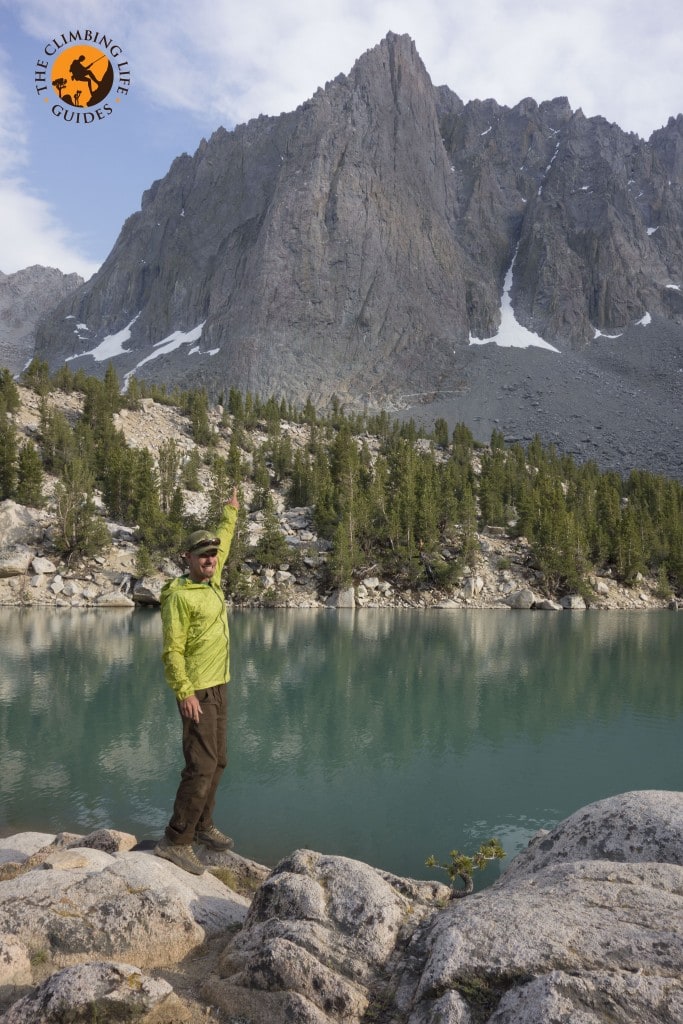
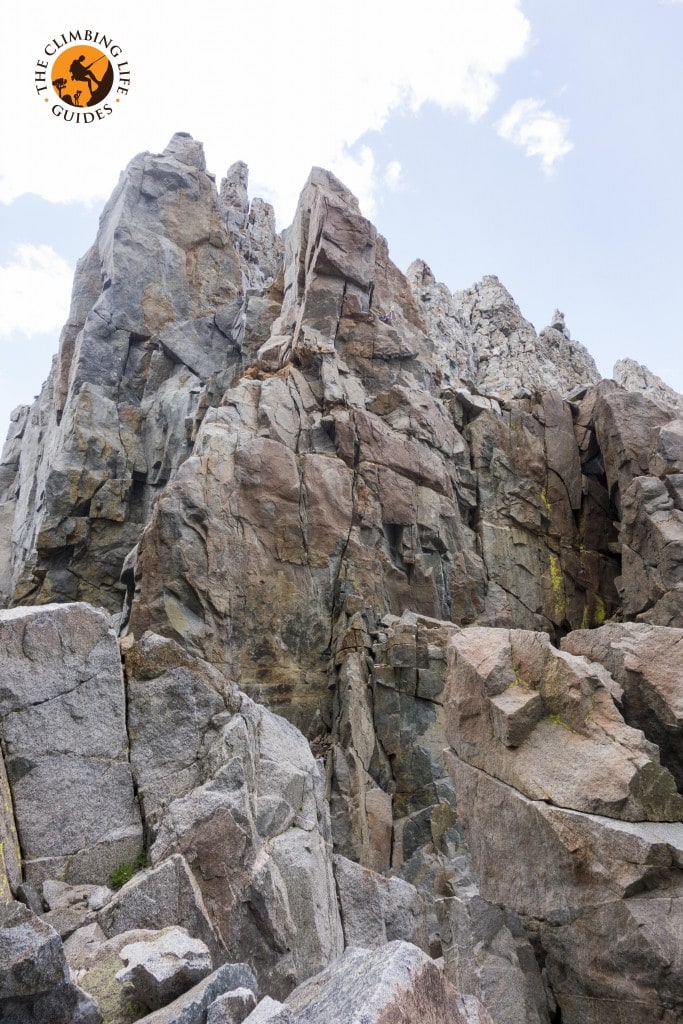
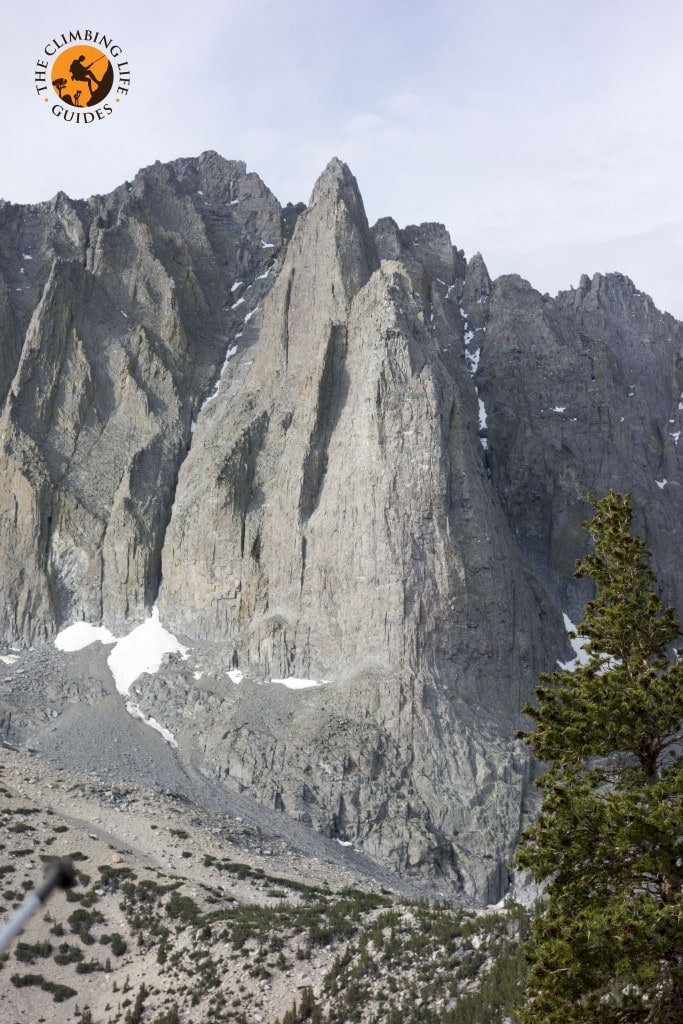
Looking up at the route
The hike in to the Temple Crag area the day before had seemed pretty casual for both of us, even with our heavy-ish packs. Polly and I are not super strong hikers, but the hike had only taken us about 3 hours. The guide book (High Sierra Climbing – McNamara) had mentioned the hike would take 4 hours to possibly 8 hours with heavy packs. Not even close!
Our rack consisted of a double set of aliens from blue through red, a single black alien, two BD 0.75’s, #1’s, and #2s, a single #3, a 70m rope, a full set of metolius ultralight nuts, and 14 alpine slings. We both agreed later than some micro/offset nuts would have been very useful, as well as a few MORE slings. The #3 got placed a LOT as well. We both wore leader/follower packs and carried about 3 liters of water, a rain jacket, food/snacks and a puffy (standard alpine items).
The information on this route seemed to be somewhat sparse given the classic status of the route, including Peter Croft’s endorsement as one of the best alpine routes in the United States.
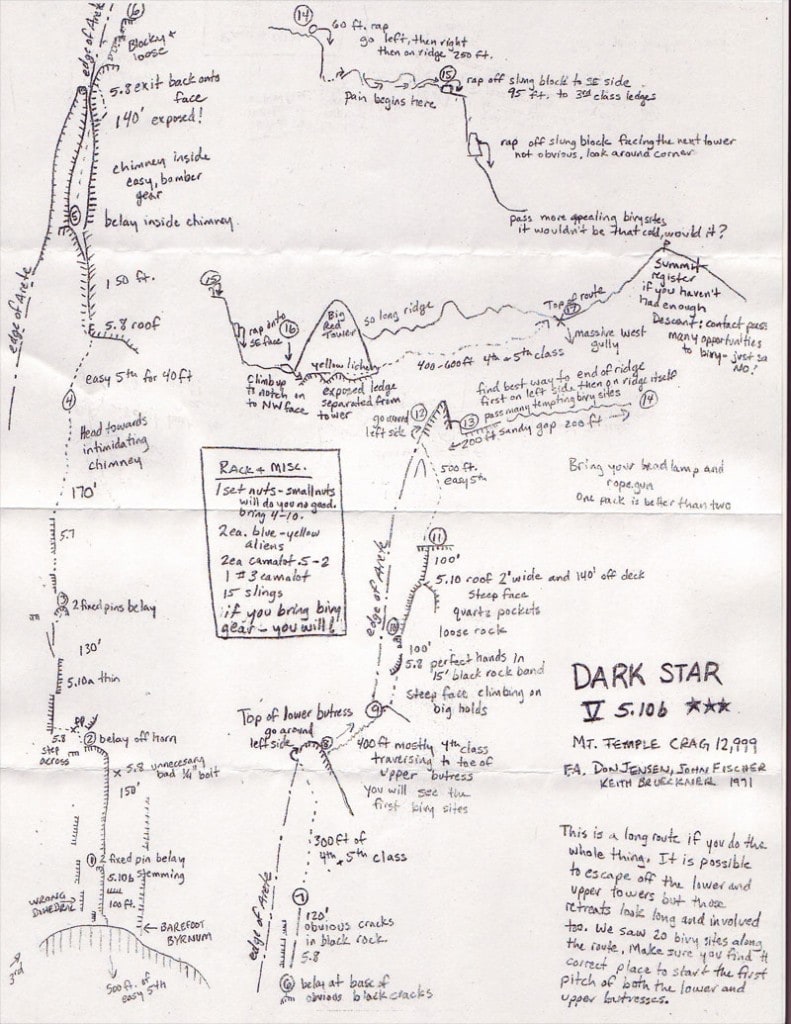
topo – one of the only ones we could find
The route was 2,200 feet of alpine granite, with multiple pitches in the 5.10 range. Our 4 AM wake up was deemed necessary by both of us.
After waking up, we ate some coffee cake (from Schat’s Bakery in Bishop – if you have’t been, get off your ass!) and drank some “nootch” – vitamin laced water. We left our camp at 4:30 and hiked to the base of the climb by headlamp.
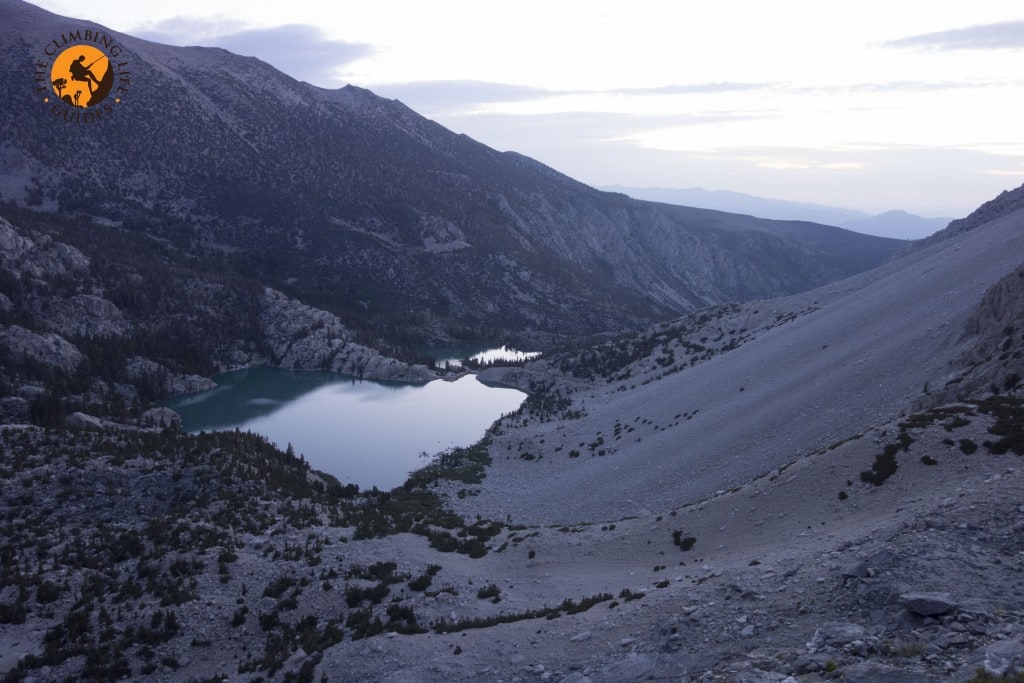
Alpine sunrise from the base of the route
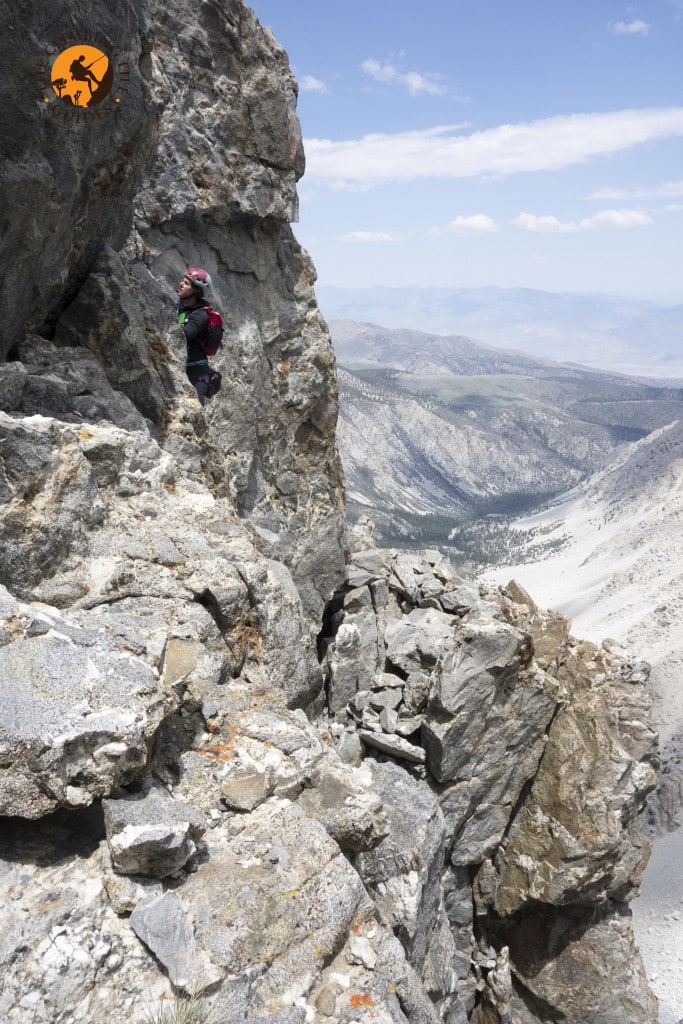
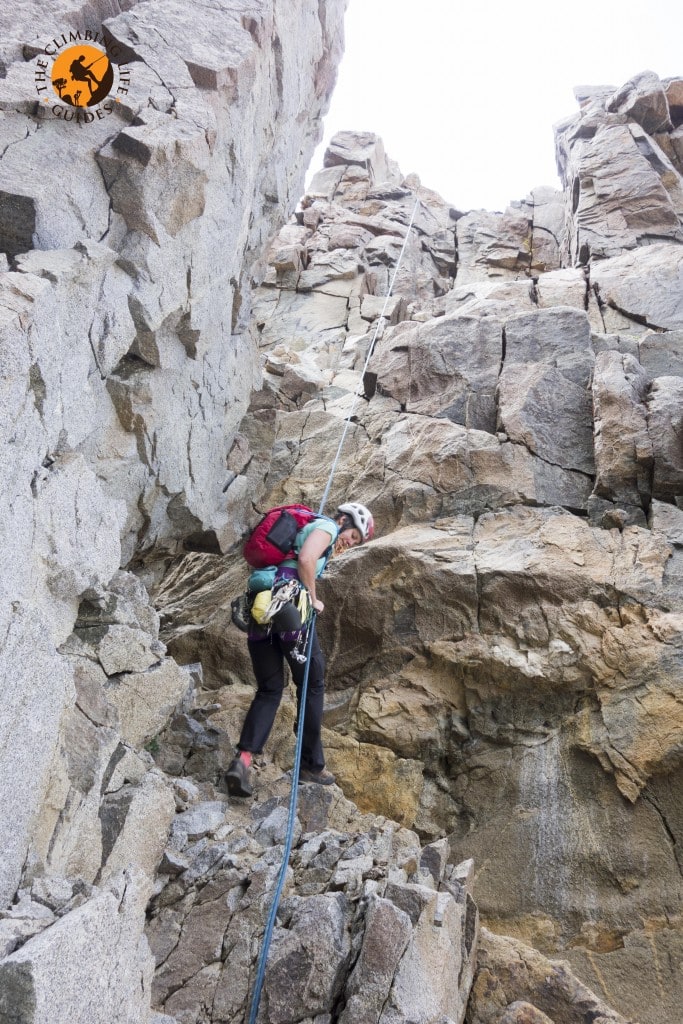
After what seemed like way too much scrambling this early in the morning, we arrived at the base of the climb at 5:15. We were able to identify the start from some photos we looked at. This photo in particular was of critical usefulness.
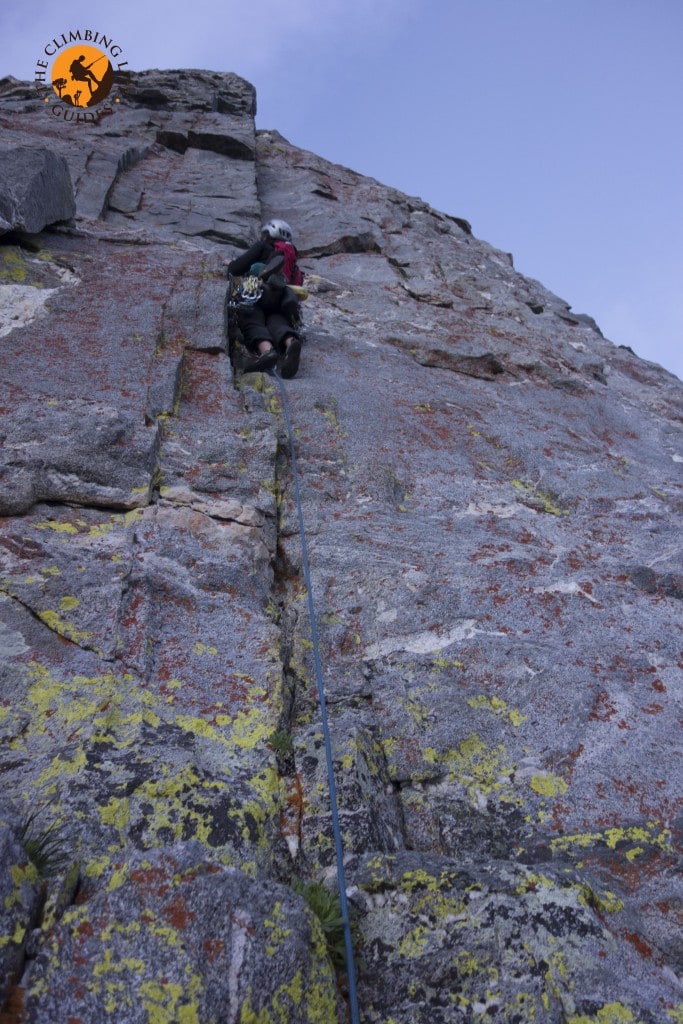
First dihedral pitch. Notice the Right facing aspect.
At 5:30, Polly began leading the first pitch. The first pitch proved to be somewhat sustained in the 5.10 range. Polly linked the first two pitches with our 70m rope and belayed me up from a ledge she stepped left onto above the 5.8 dihedral. The bolt shown on the topo in the upper 5.8 section proved to be a rusty old 1/4″ bolt with home made hanger; not really trust worthy, but Polly clipped it anyways.
The topo had shown a fixed piton belay, but she had not seen one. As I neared her gear belay, I noticed a fixed piton/bolt anchor up and right from where we were perched. The pitons didn’t look great; I don’t think we would have used this anchor even if she had found it. From where we were standing on the ledge, I went up about 10 feet to a really old rusty knife blade that wasn’t even worth clipping. There was a sloping ledge here and the topo had said to move left a ways until the next crack system could be reached. I ended up moving left about 30 feet before I found a right facing crack system that looked somewhat like what I had seen on the topo. I had noticed on the first pitch that much of the rock on this route was of horrible quality. Gear was suspect, and often loose blocks encountered mid-pitch. I was now 30 feet left and ten feet up from the first belay with no protection, and I was looking at a very committing step across (no feet) to gain a crack system. Don’t mess this up! I took a breath and committed and jammed my left foot into the crack system. I had sprained my left ankle a week prior (it was a minor sprain), and this was quite terrifying for me… I gladly shoved a 0.75 BD cam into the crack and moved upwards to the second belay. This third pitch (our second due to linking the first two) didn’t seem much easier than the first pitch with sustained 5.9 and 5.10 moves the entire length of the 180 foot pitch. After what seemed like very long ways, and using most of my gear, I looked up and right and found the two fixed pin and one fixed nut belay. Whew. The picture below looks a little messy… I was out of slings and ended up using some lockers (the ones my double length and auto block are stored on) from my harness.
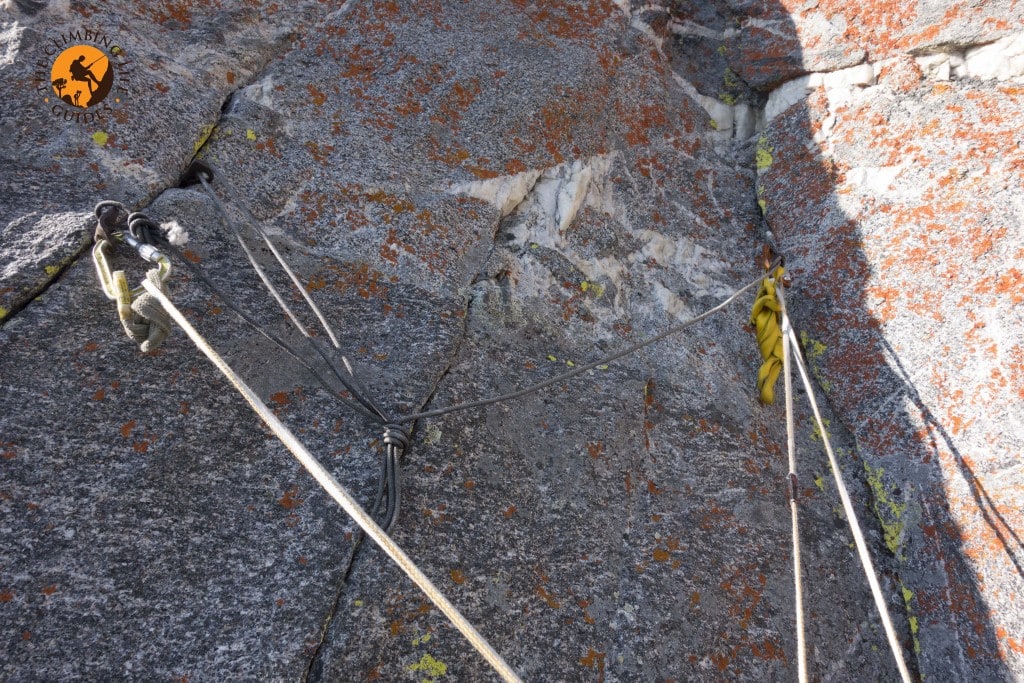
Second belay (third pitch on topo)
I backed up the system with a BD #1 I shoved behind a flake to the right side of the anchor.
Polly came up to the belay and swang through on lead.
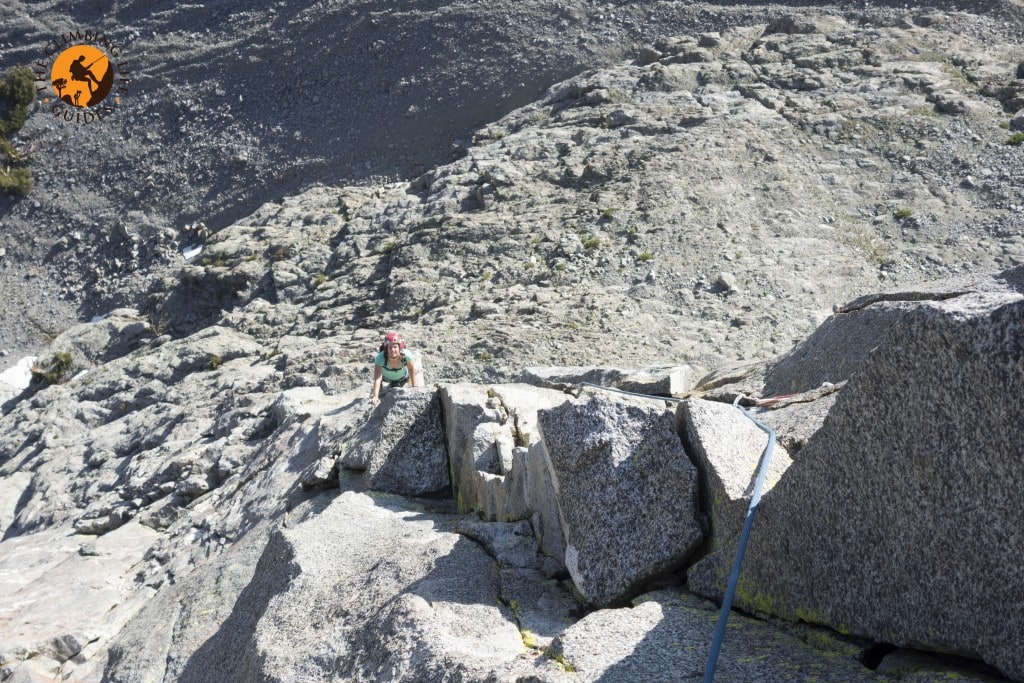
Polly following our second pitch
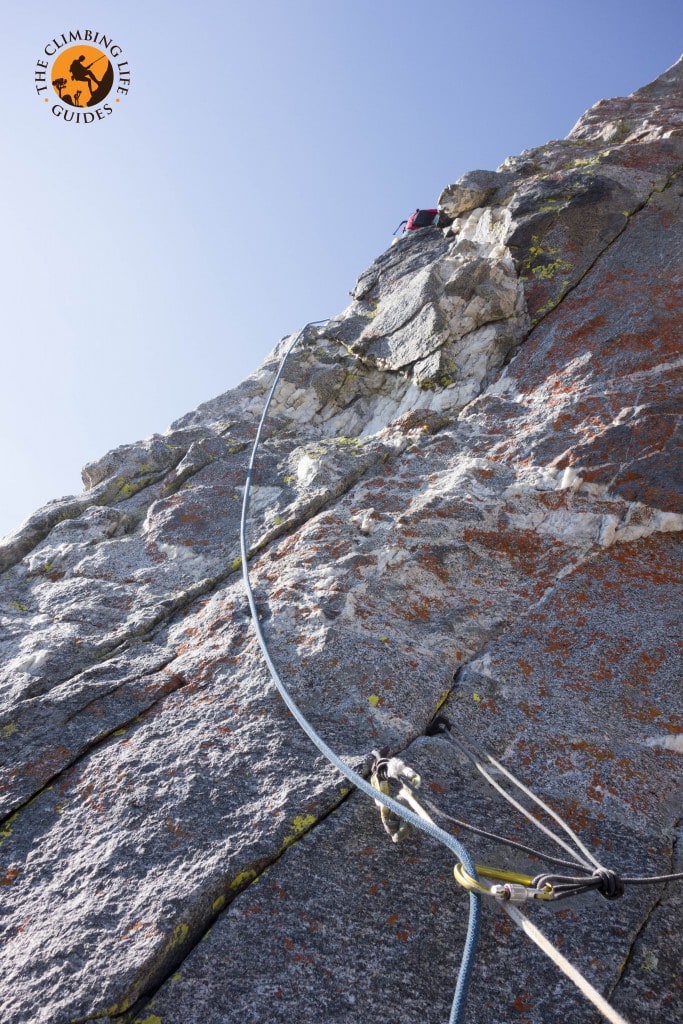
Polly’s next lead
The next pitch went up and left at around 5.7 for a ways. Then turned into 4th and low 5th class. Polly ran the rope almost to its end before building an anchor and bringing me up. This seemed to end up being the most practical method on many of the upper pitches. We were aiming for a chimney system above us; I led up about another 100 feet from where Polly had built her anchor before building another anchor and bringing her up to the base of the chimney.
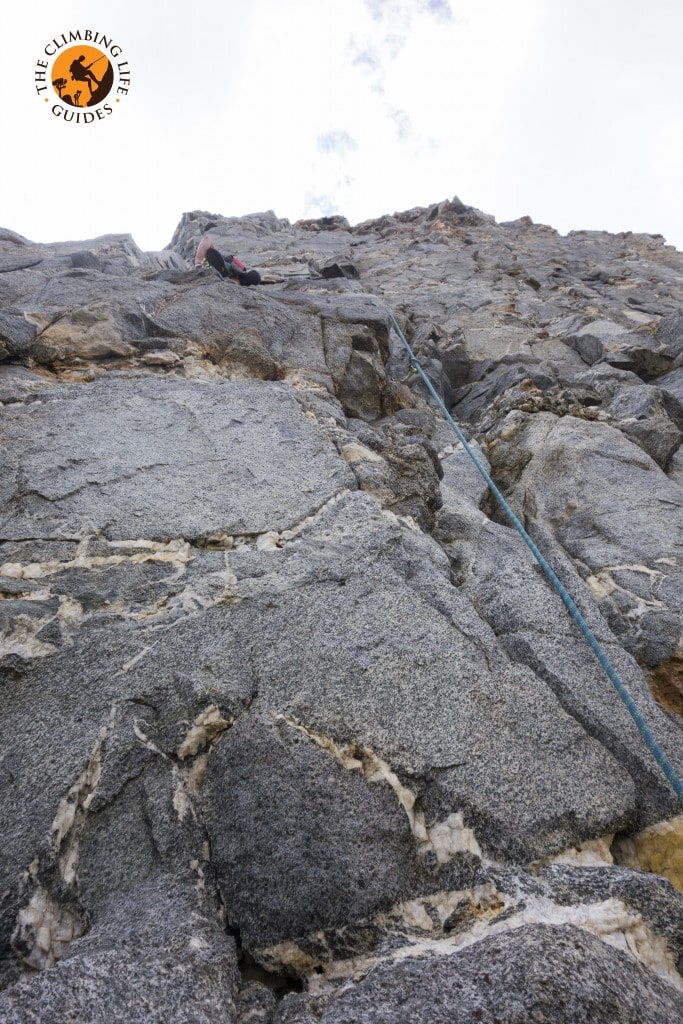
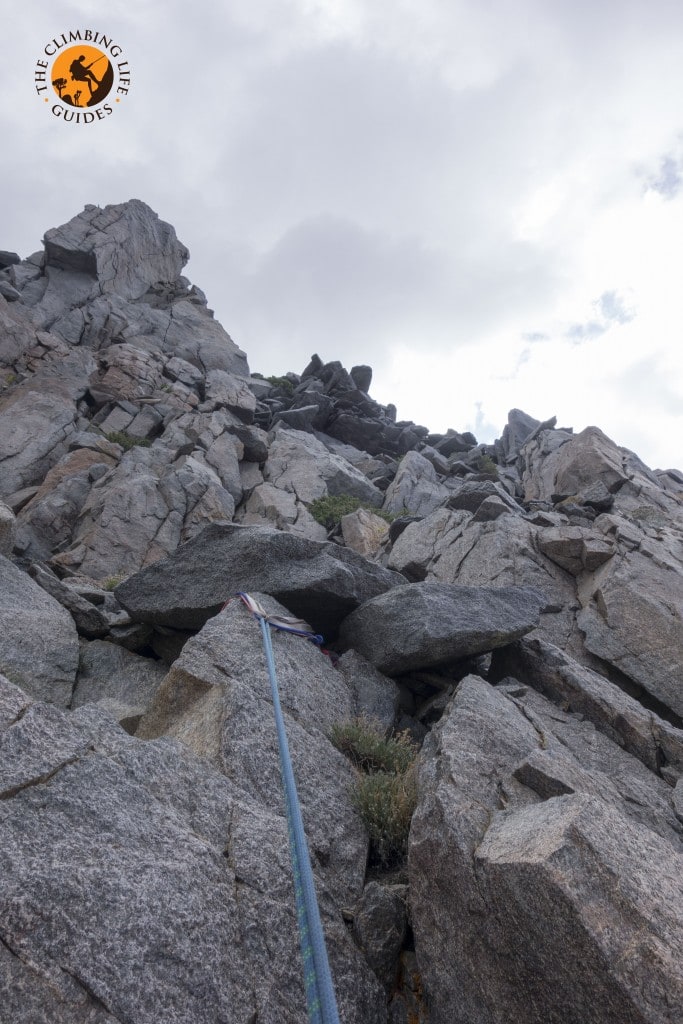
The pitch below the base of the chimney
The topo showed a 5.8 roof leading up to the base of the chimney. I definitely found this roof… and it was quite sustained 5.8 and climbed through horrible quality rock. Much loose rock, questionable gear and massive exposure made this pitch a bit scary.
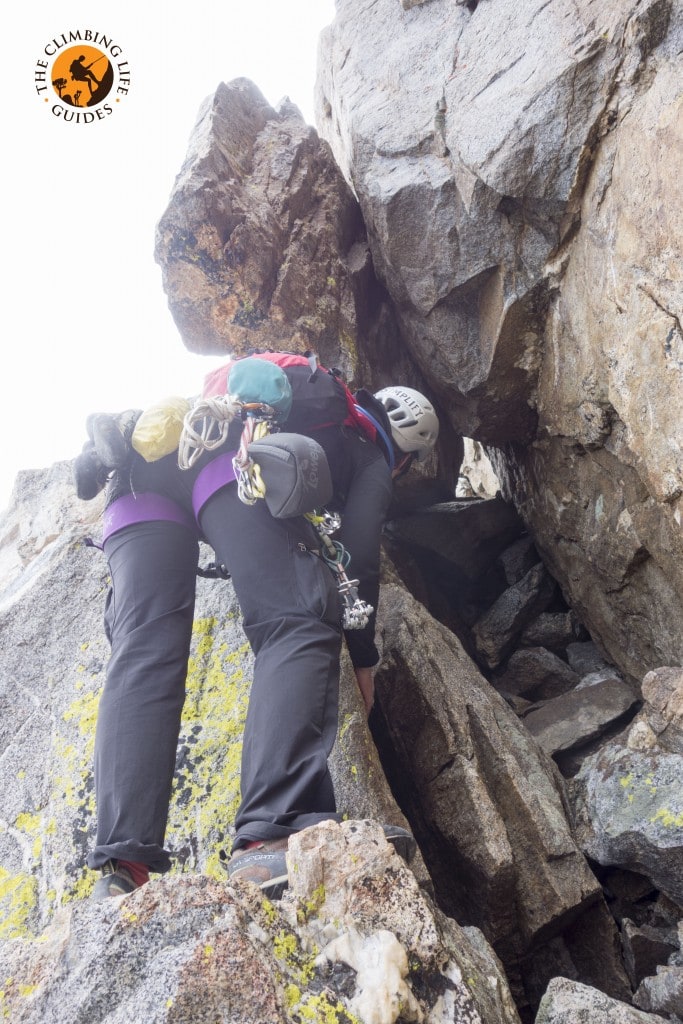
Polly pulls the 5.8 roof
The next pitch, the chimney pitch, was probably my favorite on the route. Chimneys are not much fun, but the exit moves from this chimney were quite exhilarating. I led up into the chimney not quite knowing what to expect, other than tagging my pack from my belay loop while I clambered up through it. About half way up the chimney, a lot of broken debris had fallen and wedged itself into the chimney. There was a small hole through the middle of the debris, and at first I thought I might be able to squeeze through this hole. Nope… didn’t fit, even with the helmet off. I ended up going further inside the chimney around this constriction. Then up a ways until I could see the chimney squeezing down. Then out of the chimney on the climber’s right side. This involved stepping out onto big holds with 2,000 feet of air under your feet. Amazing!
After the chimney, I pushed the pitch up another 100 feet to a small stance. Massive rope drag made this push quite strenuous. I was happy Polly popped out the chimney and onto the face and the rope drag ceased.
ledge above chimney
I didn’t put much protection on this pitch; if I had, I think the rope drag would have been unmanageable. I ended up putting two pieces inside the chimney near the top exit (red alien and #2 cam), and the rest of the pieces you can see in the above picture. My anchor here consisted of a green alien, blue alien, and red alien. I’m pretty sure I climbed the 5.8 crack shown on the topo above the chimney (about halfway up the next pitch).
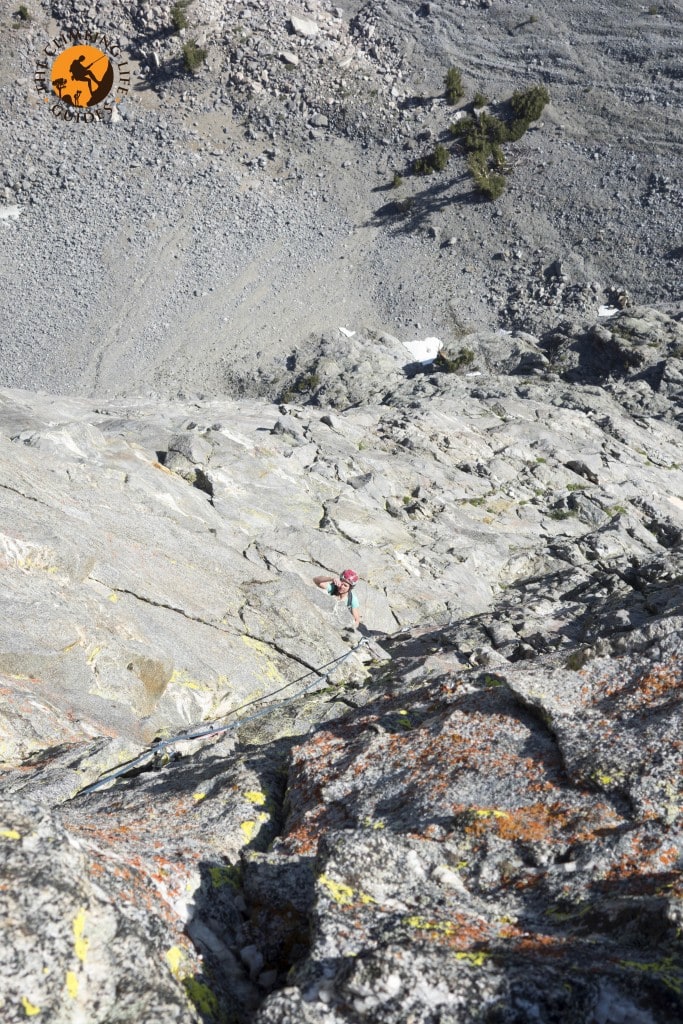
Polly swung through on lead again and proceeded up the face until easier terrain started.
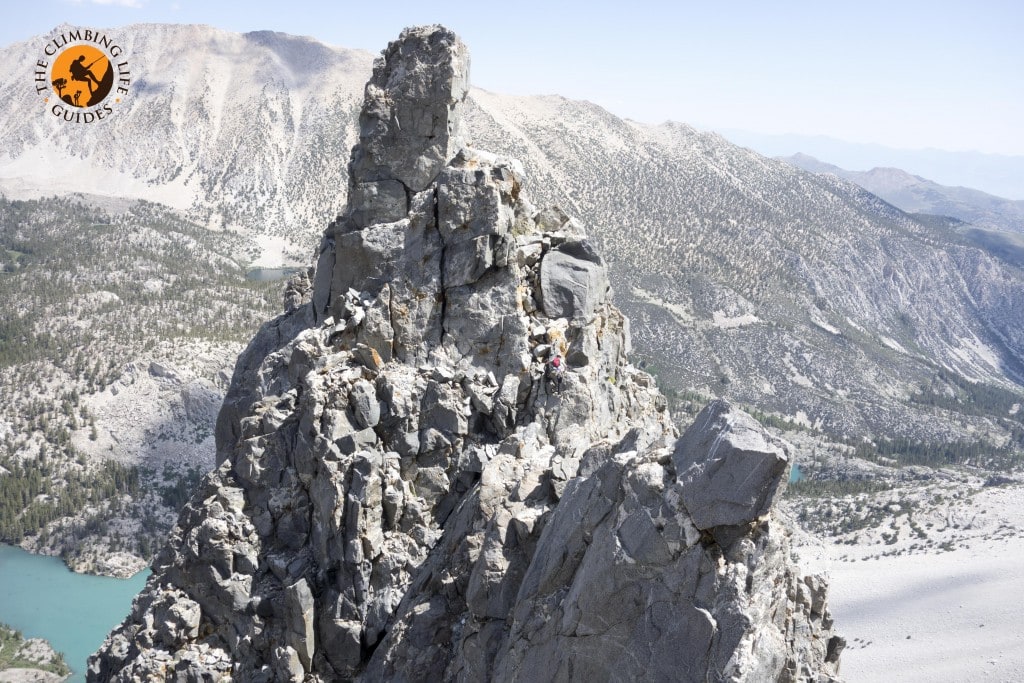
Polly nearing the top of the first buttress
We were pretty close to the top of the first buttress at this point. For the remainder of the first buttress, we unroped and simul-solo’d up. We considered simul-climbing, but the horrible rock quality and wandering nature of the face made this option unappealing. Simul-climbing with questionable gear in bad rock seemed more dangerous than simply coiling the rope up and simul-soloing and avoiding the inherent rope drag.
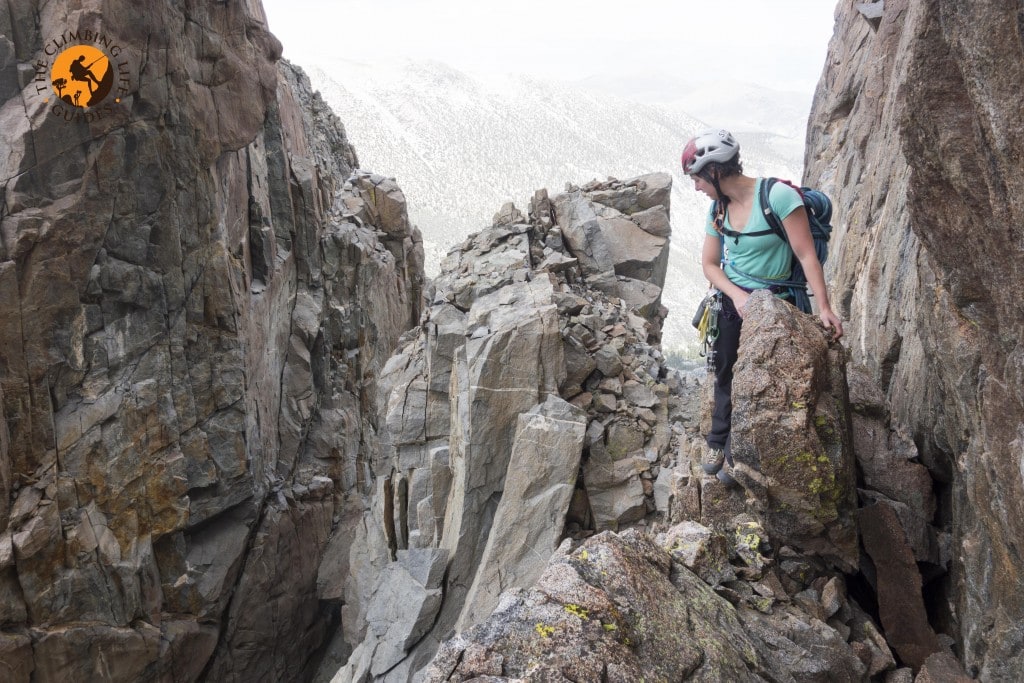
We approached the top of the first buttress and crossed the top of the ridge that separated the first and second buttresses.
crossing the top of the first ridge
The rock quality during the simul-soloing was less than ideal, which made us extra cautious with our footwork and trusting any of the rock along the ridge between the first and second buttresses.

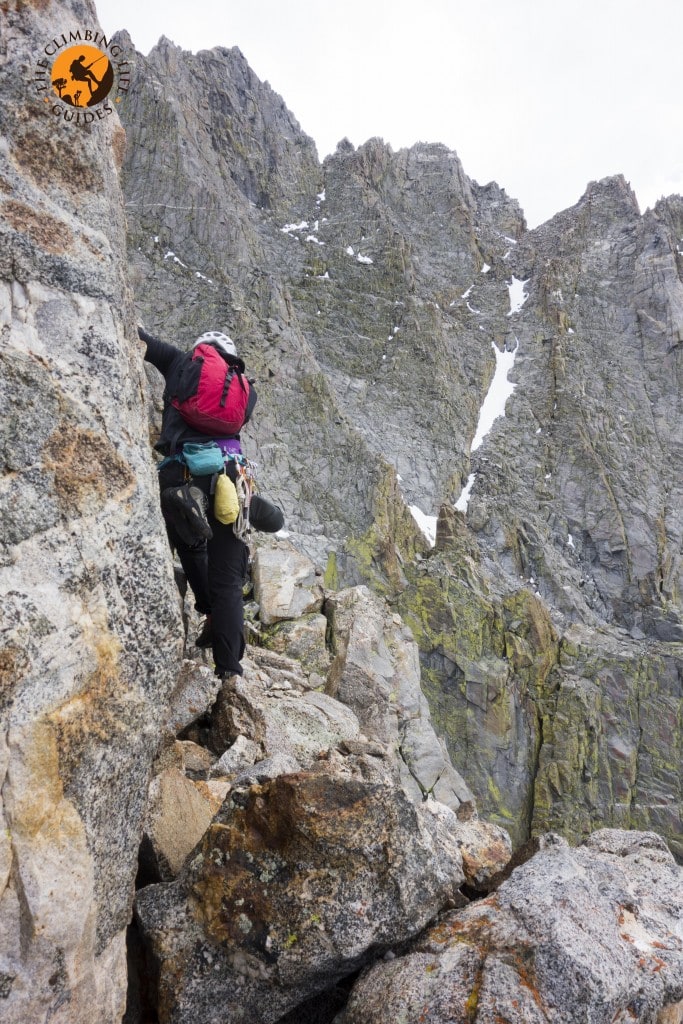
heading up to the top of the first buttress
the top of the first buttress
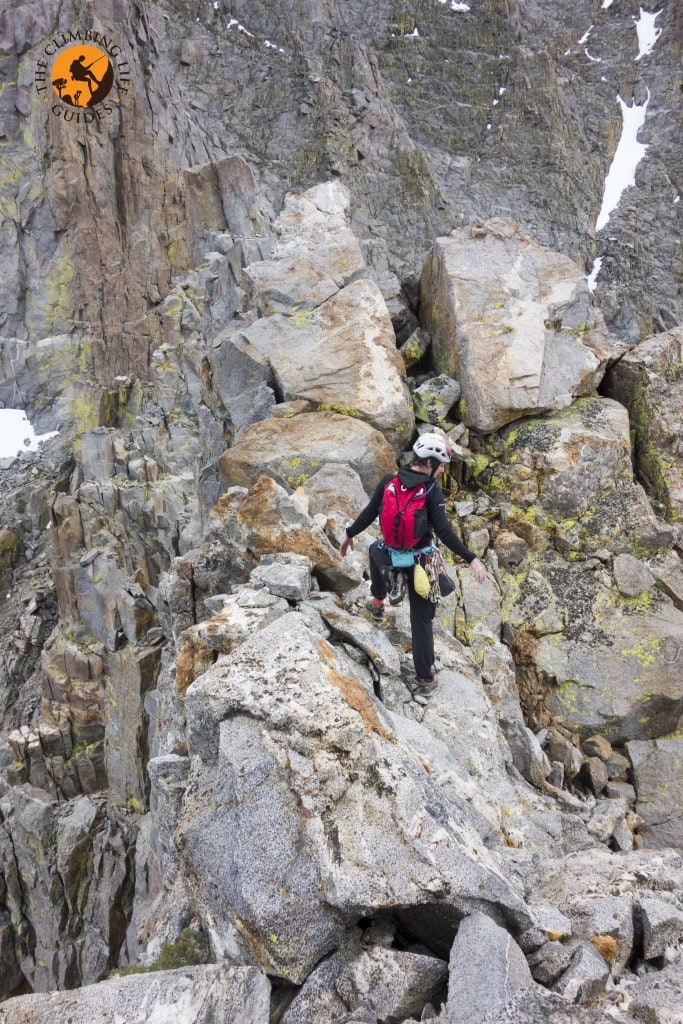
crossing the ridge
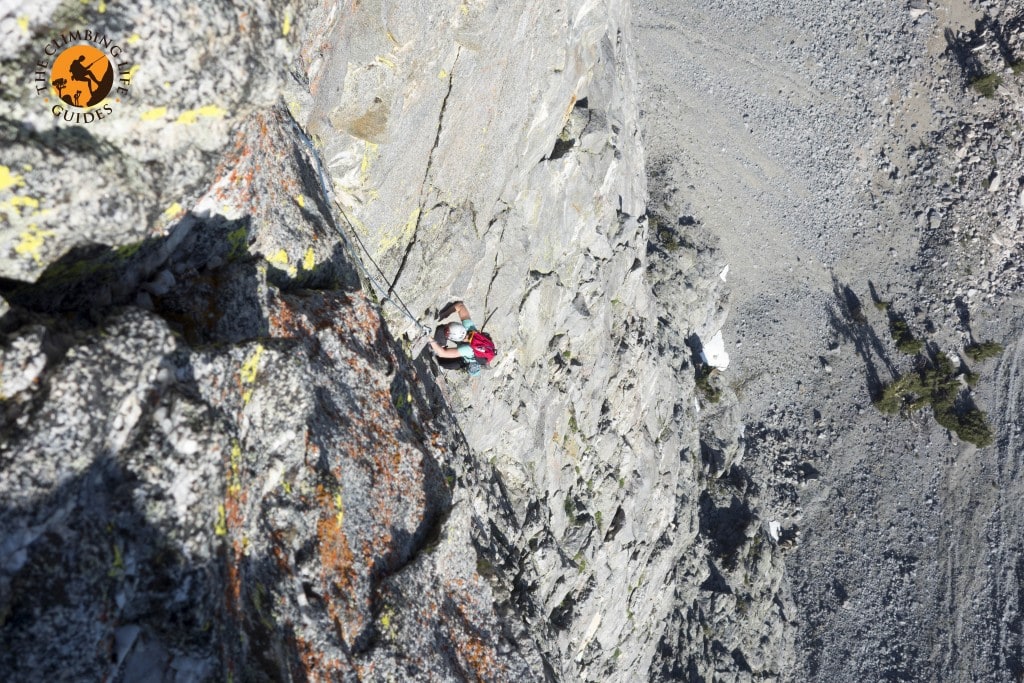
Crossing the ridge involved massive drop off exposure on either side of the ridge. Probably 2,000 feet straight down. This was the main theme of much of this climb – massive exposure, bad rock quality, and simul-soloing across ridges. In other words, gripping and terrifying ridge romping.
We headed up to the base of the second buttress. The beginning of the next pitch was somewhat ambiguous, but we clambered up to the high point of the scree on the next buttress face and led off from there. Much of this route requires mountain sense. Or using your head to find the easiest looking line to proceed up. Polly led up this pitch, which proved to be somewhat unprotectable face climbing through loose 5.8 terrain and up through a 5.10 crack section. This was quite enjoyable to follow with really fun movement, but I’m sure it was rather terrifying to lead given the horrible rock quality.
Second buttress first pitch
This pitch ended up being nearly 200 feet long, definitely 5.10, and Polly ran the rope for as long as she could stand the rope drag. After I arrived at the anchor, I swung through on lead. Polly’s anchor was around 20 feet above the business of the route, and 20 feet above her anchor the face turned back into 4th class. I ran the rope for about 200 feet anyways, placing maybe two pieces of pro. As I neared the top of the buttress, I found a suitable anchor spot and brought Polly up. From here on out, we pretty much coiled the rope up and simul-solod. Polly put on her approach shoes here, while I kept my climbing shoes on for the time being. I was still pretty apprehensive about soloing over horrible quality rock.
cool passage on top of second buttress
The way through the ridge line of this climb is not obvious. It requires a lot of route finding and mountain sense. Just when things are looking extremely dangerous/sketchy, passages like the one above show up. Needless to say, massive exposure while crossing loose rocks and multiple sections of unprotectable low 5th class climbing are required to pass along the ridge line.
Our path pretty much followed the left side of the ridge line system for the first half of the second buttress. We were looking for a 60 foot rappel that separated the second buttress from the third, and we thought we would never find it. About half way across the ridge line between the second and third buttress, we encountered a bit of a scary section. Well, most of it was scary. So a bit of a “scarier” section.
scary spot
This section happened when our “follow the left side of the ridge line” abruptly ended with these two options. A very exposed fifth class down climb section (if you messed it up, you would plummet for 1,000 feet to a rocky death), or a sketchy 5th class traverse move that looked a bit easier. I opted for the traverse move, climbing upwards for a few moves. Chalk could be seen on both options, so I picked the easier looking of the two. I snapped a picture of Polly following my lead on this. After this traverse move, a small down climb climber’s right side led us to ledge. We then climbed back up and over to climber’s left of the ridge system and continued up improbable looking 5th class broken-ness.
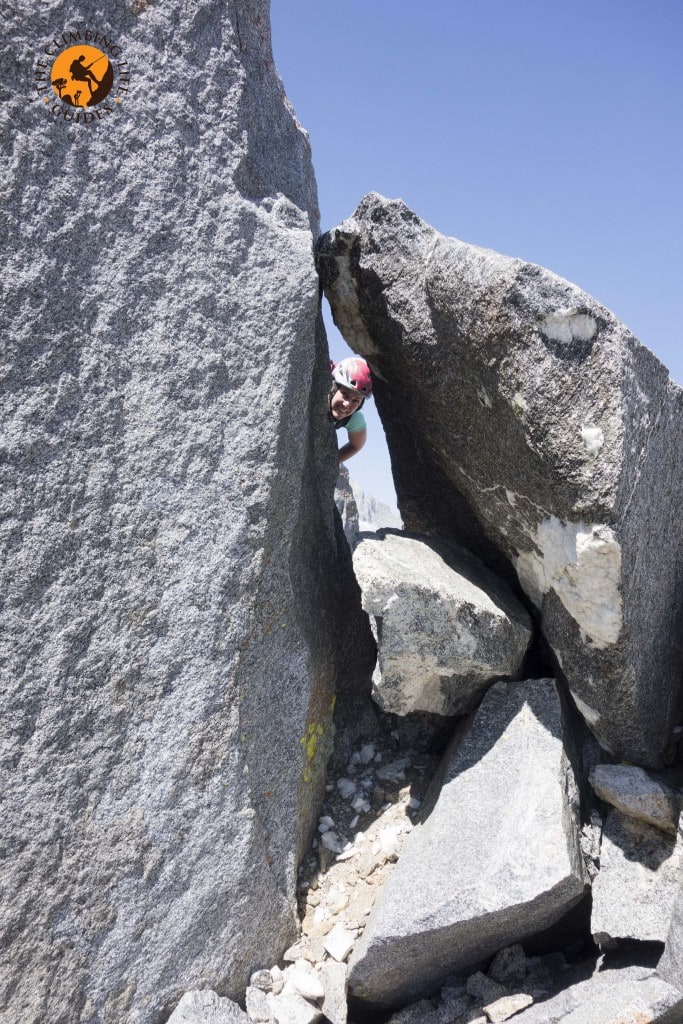
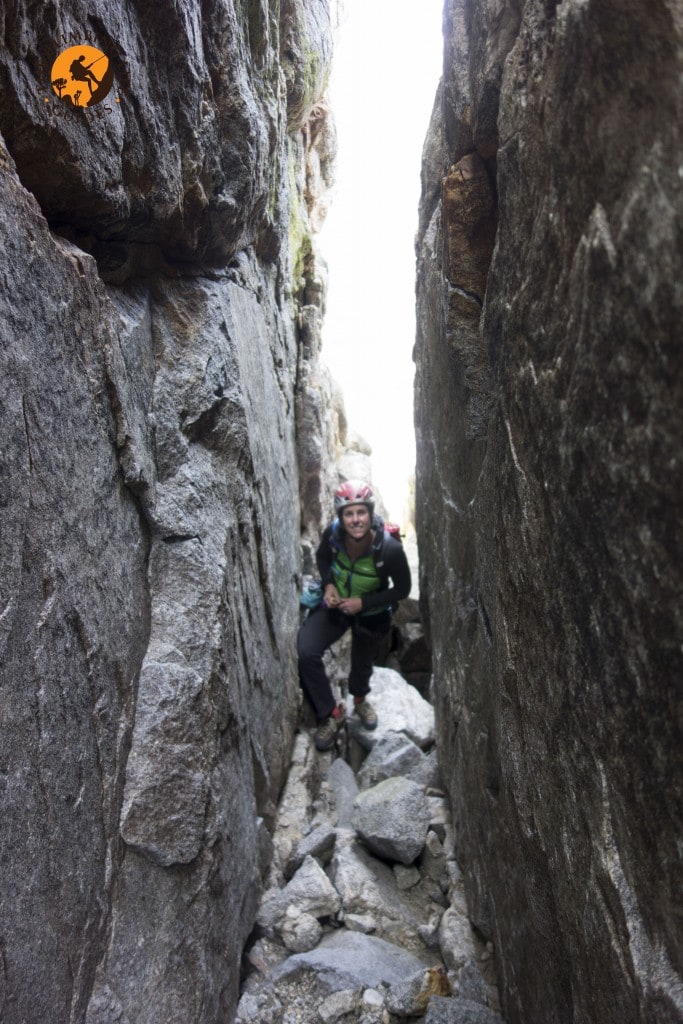
Polly wanting to go through instead of exposed “around”
After this exposed left side, we managed to switch sides to the right side of the ridge system which seemed a bit easier.
the better right side!
After about 40 feet of the right side, we swung around the end of a blocky section and found our 60 foot rappel. A slung rock with double non-locking carabiners. The slings were generally in good shape. Finally, we had reached the 60 foot rappel! We rappelled to the climber’s right side of the ridge line and pulled our rope.
more ridge romping
After the 60 foot rappel, we crossed a few more sections of 4th and low 5th class along the ridge line. We tended to stay on the right side of the ridge line mostly during this last section. In the picture above, you can see the end of the ridge line system, and also the location of two 80 foot rappels. The rappels originated on the side of the last high “peak” seen in the picture. The rappel station was in decent order. After the first rappel, a bit of scrambling up and climber’s right from the obvious landing zone located the second rappel station. This one was in pretty bad shape. I donated a double length sling to the system and rappelled off the locker. All of the rappels were off of slung rocks/horns; the rock was solid. I would recommend bringing a double length sling with you in case the slings are weathered to an unsafe condition.
Polly on the last rappel
Our topo mentioned a “red cliff and a yellow lichen area”, and passing between the lichen covered area and red cliff. We scrambled upwards towards the red cliff. From here we had the option for an easier down climb, or climbing up and traversing along the face of the red cliff. Eventually we decided to climb up and traverse along the face of the red cliff. This led us to low 5th class down climb shortly after the climb up and traverse over.
double rappel station locations (can see both stations)
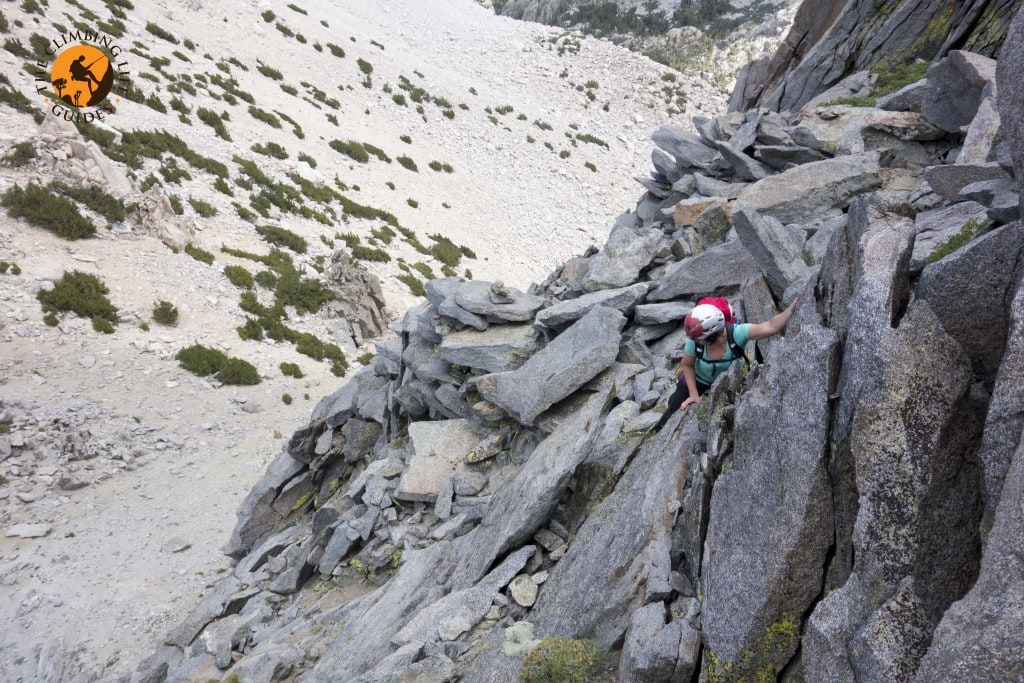
After the down climb, we looked up and found ourselves at the base of the last long section before the summit. This section wasn’t nearly as exposed, but contained mostly easy 5th class and 4th class scrambling all the way to the top of the ridge line and end of the route. We simul-solo’d up this last section, taking several breaks to catch our breath. We were now approaching 13,000 feet elevation and we could definitely feel the effects of the oxygen deprived air!
scrambling up the last long section
As we neared the top, we headed towards climber right and toward the obvious highest point of the formation. This highest point proved to be yet another ordeal in accessing with some serious exposure and more 5th class soloing. However, we both committed to the moves and made it to the summit.
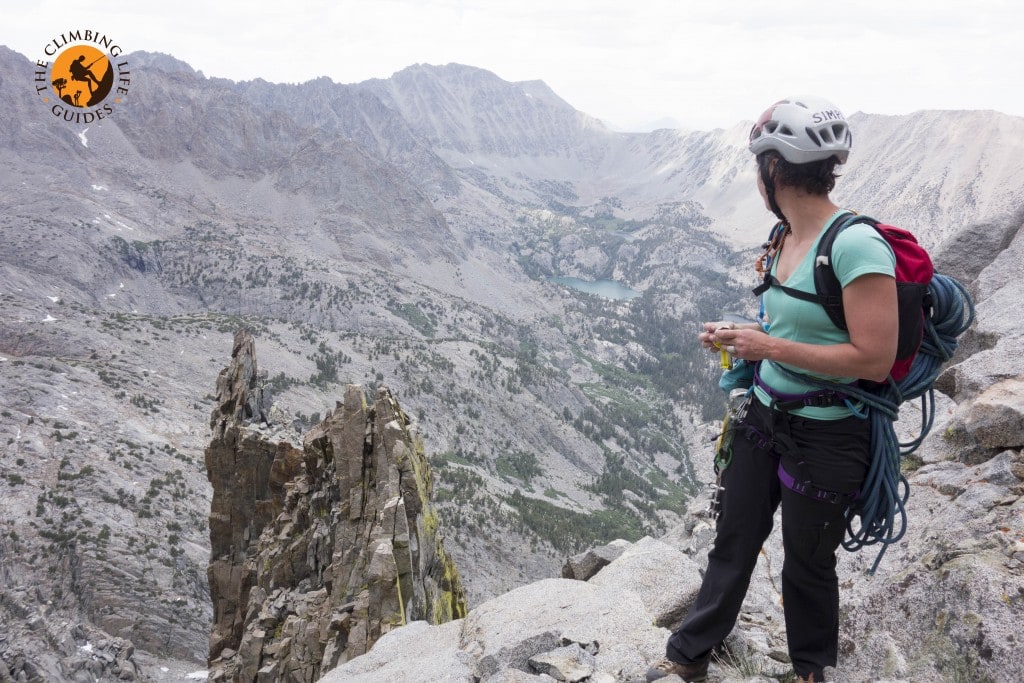
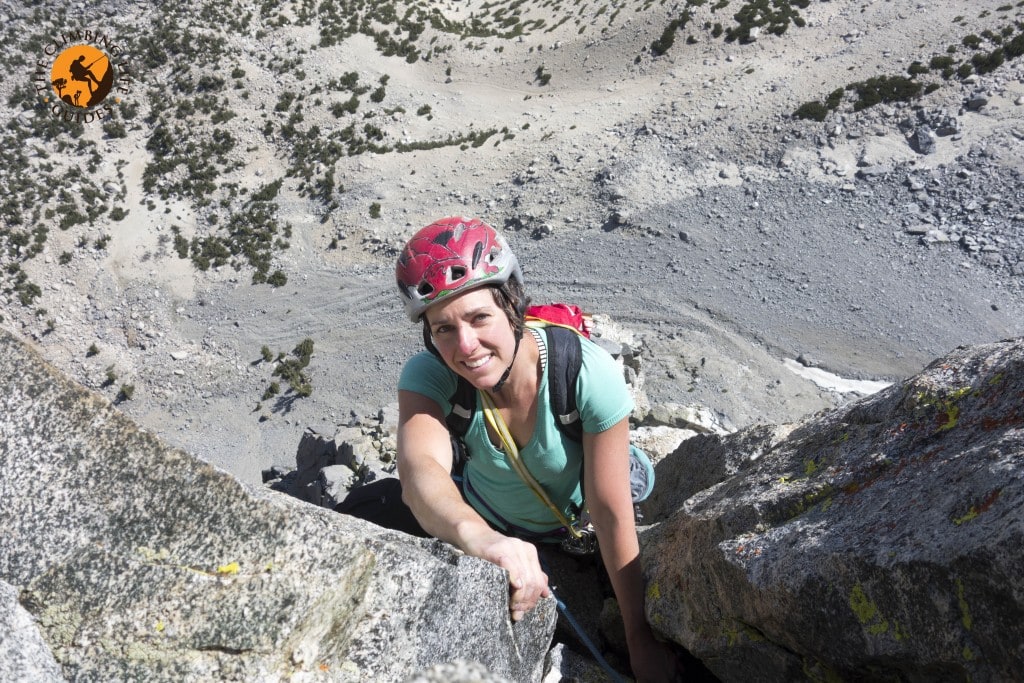
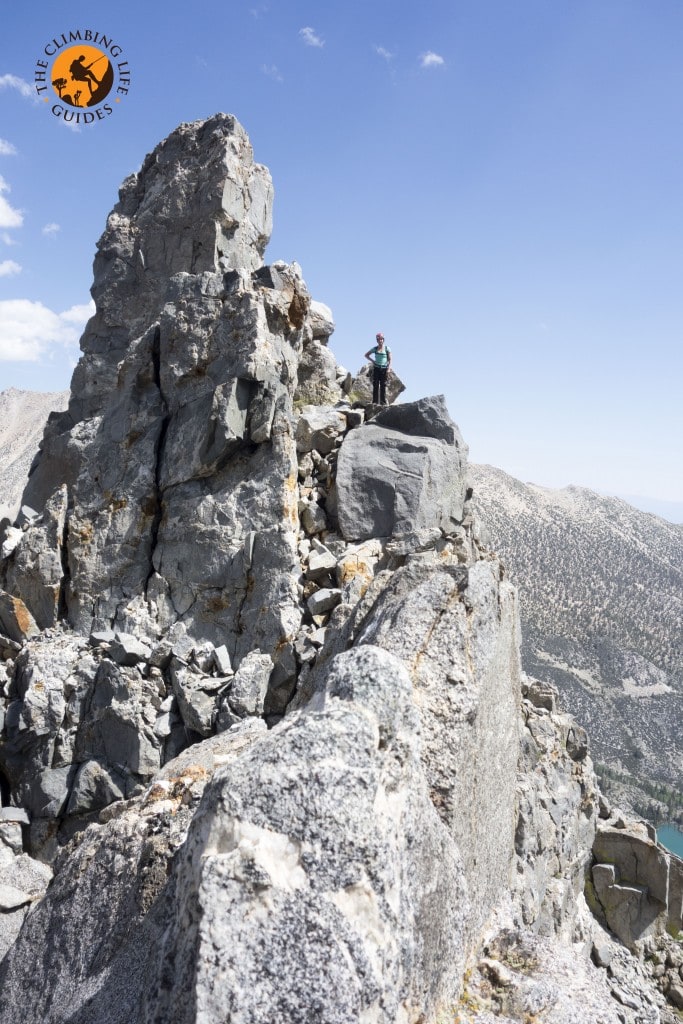
nearing the summit
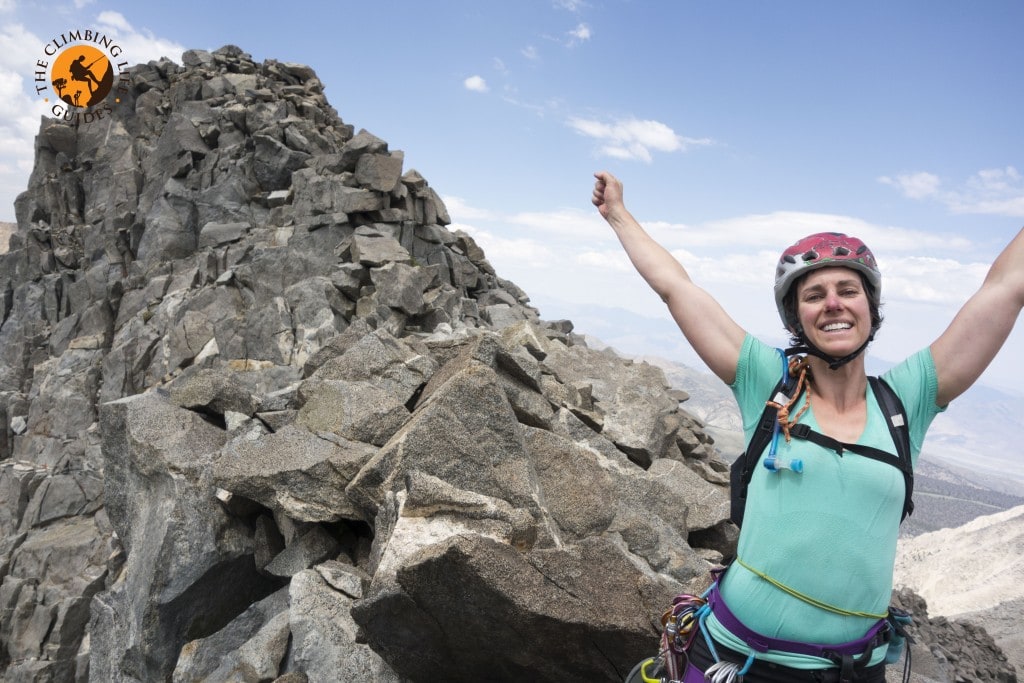
Polly stoked at the top
After a few moments at the top, and a bit of discouragement at the lack of a summit register, we headed down. We stopped for a small snack and felt a few rain drops, but the weather managed to stay clear. Perhaps it was Polly’s statement “Zeus, no…” that she muttered under her breath, but mostly I think it was just our lucky day. We arrived at the summit at around 3:00 in the afternoon.
The deproach followed a scant climbers trail down some loose sand and scree for about a quarter mile. We then veered left and followed the trail (marked now with cairns) down some steepening terrain. Our topo had mentioned to stay away from the enticing gully on the climber’s right side, which we did. Eventually we were again down climbing in near fifth class terrain.
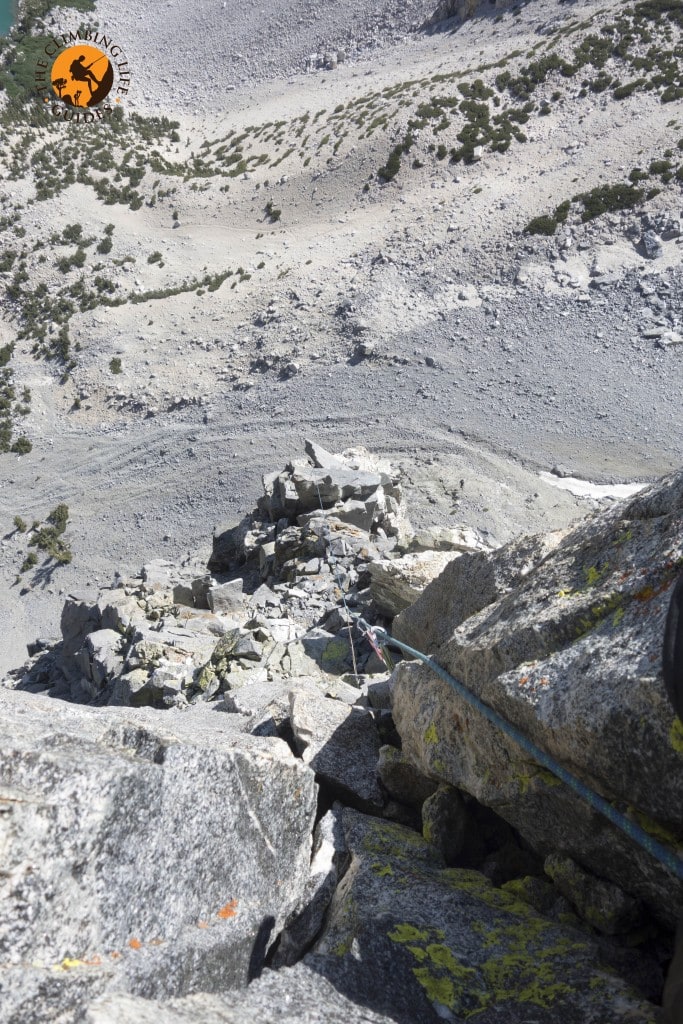
looking for the rappel station
Luckily, the rappel station appeared shortly after the down climbing shown in the picture happened. The station was to the right of where Polly is shown in the picture, and down about another 30 feet.
We did a single rappel to the ground and walked back down to the 3rd lake. This decent took us about 2 1/2 hours altogether from the summit to the camp.
rappel station
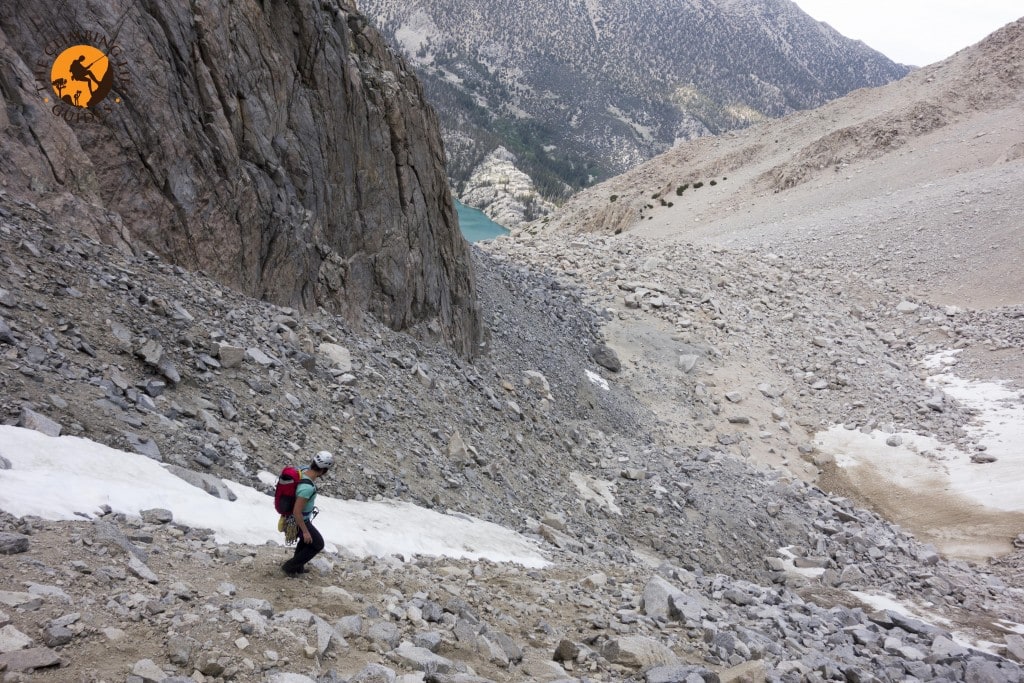
scree slope
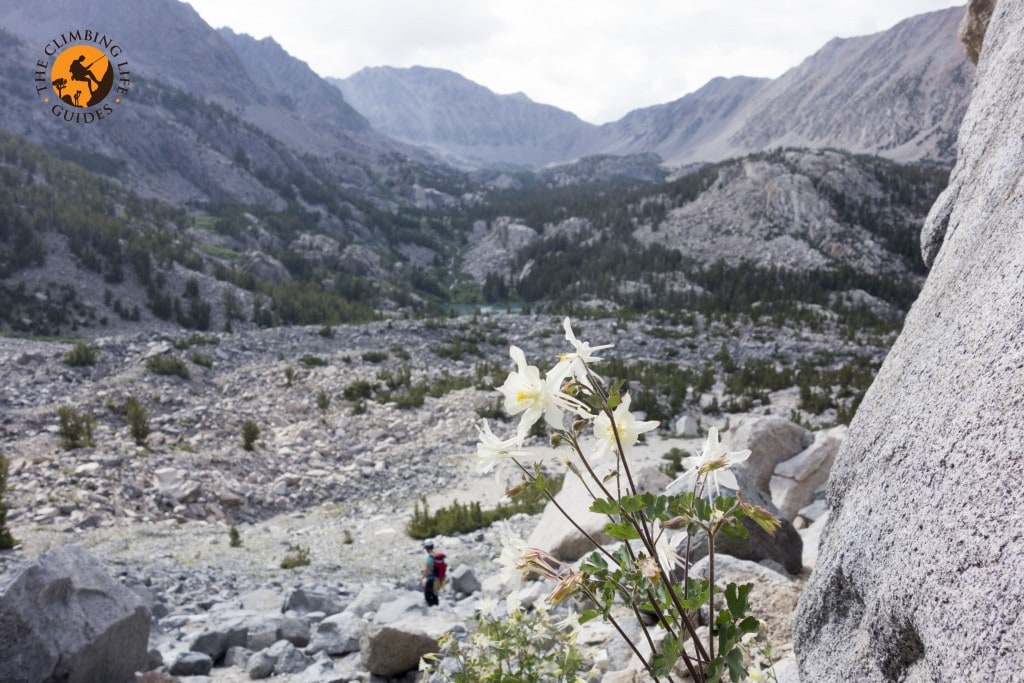
beautiful columbine flowers
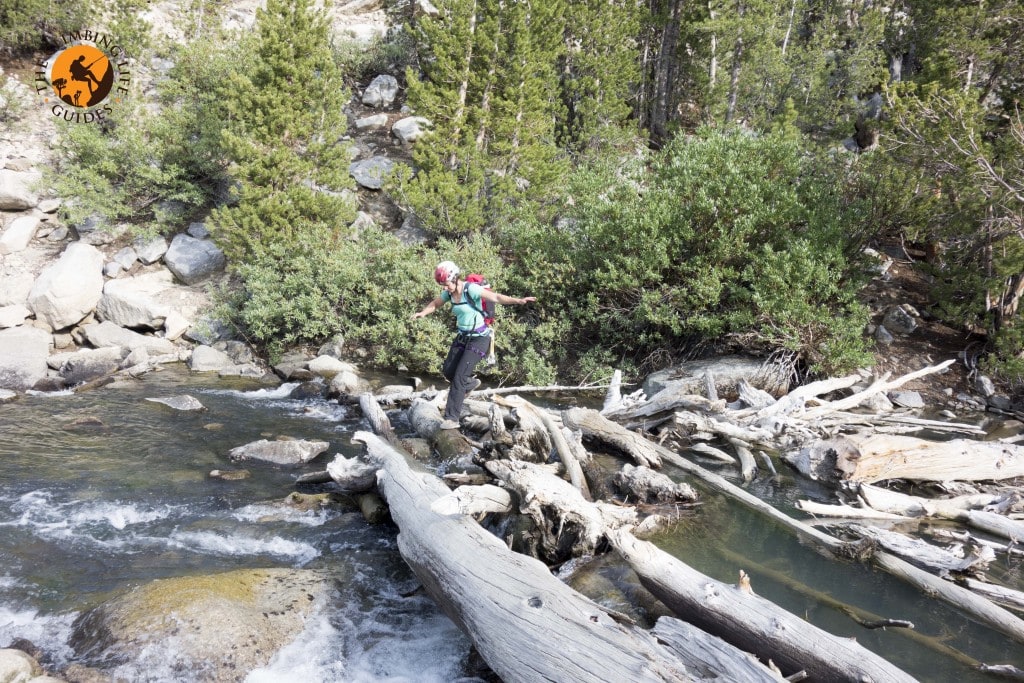
mandatory river crossing
We crossed back over the stream that separated the 2nd and 3rd lakes and got back to our campsite in time to be swarmed by hungry mosquitoes. I was extremely grateful to have had some bug repellent with us. We took off our shoes and soaked our aching feet in the ice cold lake water, filtered some water, drank a lot of water, cooked our dinner and went to sleep. Awesome day.. Our hike out back to the cars took us about 2 1/2 hours (1/2 hour faster than the hike in).
parting look on the hike out
I took this picture on the hike out. You can see the ridge lines rather clearly in this shot; it is always interesting to look at a mountain after having climbed it. Your perception of the intimate details of the mountain always changes. This mountain had let us clamber to the top and back down with no major mishaps and with excellent weather. It was a great day!
July 6, 2015. Posted by: nelsonday